How to use a custom domain from Squarespace with Proton Mail
- Lettura
- 9 minuti
- Categoria
- Domain setup
If you have a custom domain (like yourdomain.com) from Squarespace, you can use Proton Mail to send and receive emails using addresses like eric@yourdomain.com instead of eric@protonmail.com. Custom domain is available on all paid Proton Mail plans.
If you’re looking for general information about this feature, or want to set up a custom domain from a different provider, check out our general article on how to use a custom domain with Proton Mail.
- Before you get started
- Step 1: Connect and verify your domain
- Step 2: Set up custom domain addresses
- Step 3: Configure DNS records in Squarespace
Before you get started
If you’re on a Proton for Business plan, you’ll need to create your organization before you continue. Make sure you have enough seats (user licenses) to cover the number of custom domain email addresses you want to create.
Step 1: Connect and verify your domain
Note: The steps below apply only if your domain’s nameservers are set to Squarespace DNS. If your nameservers point to another service, add the same DNS records in that provider’s DNS management console instead of the Squarespace dashboard.
- Sign in to the Proton Mail web app (account.proton.me/mail) and open your account settings (Settings ⚙ → All settings).
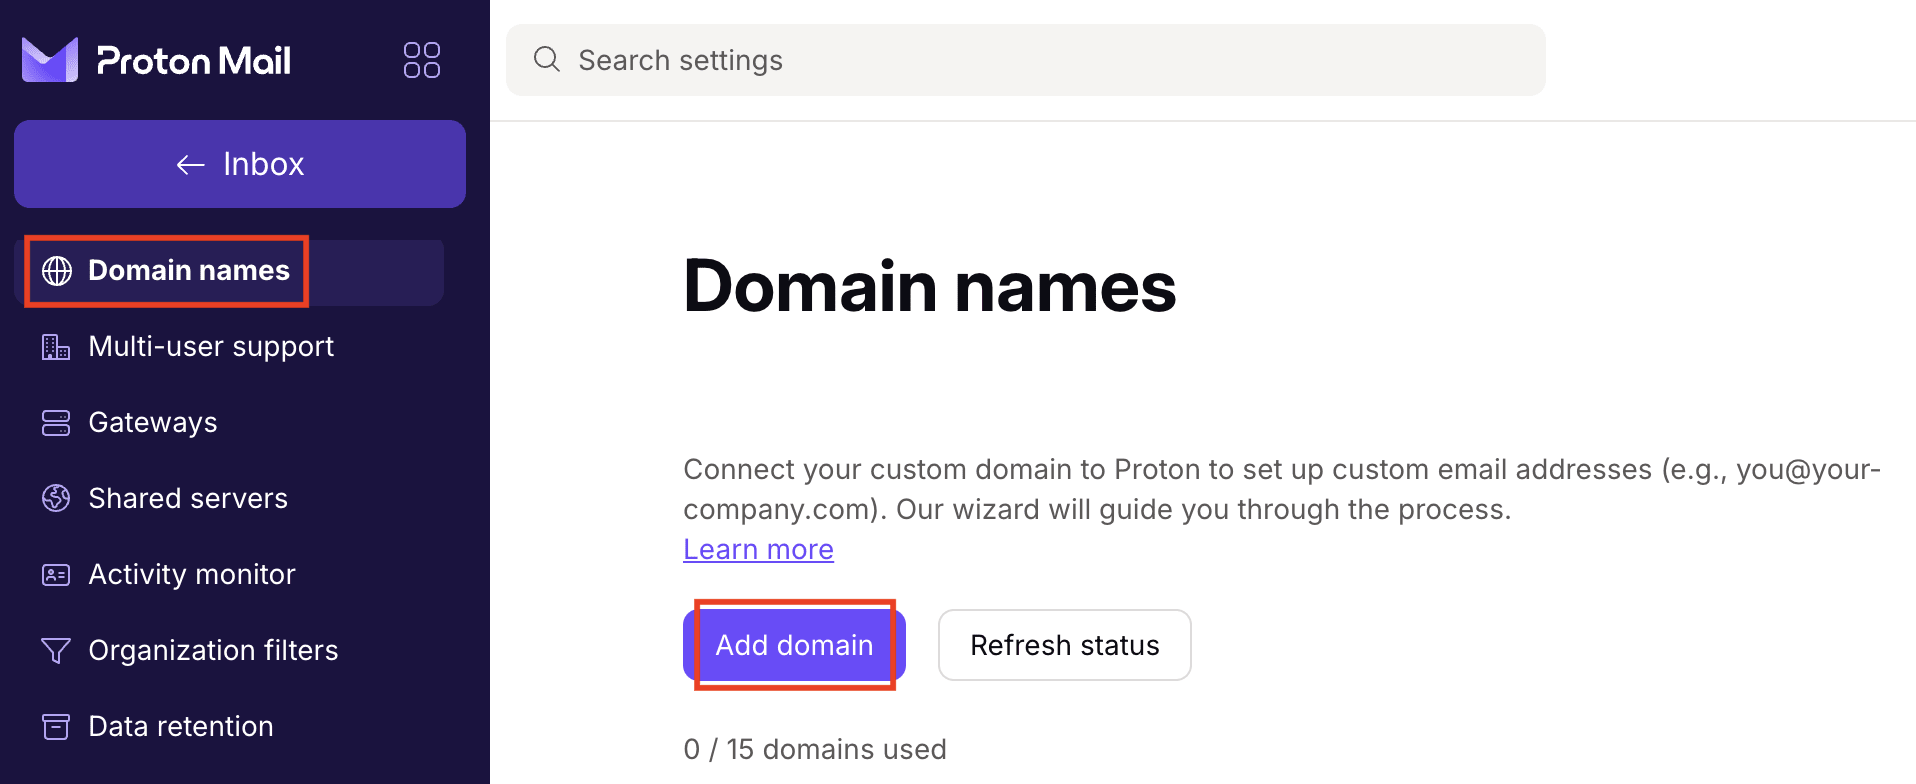
- Select Domain names from the sidebar. Click Add domain.
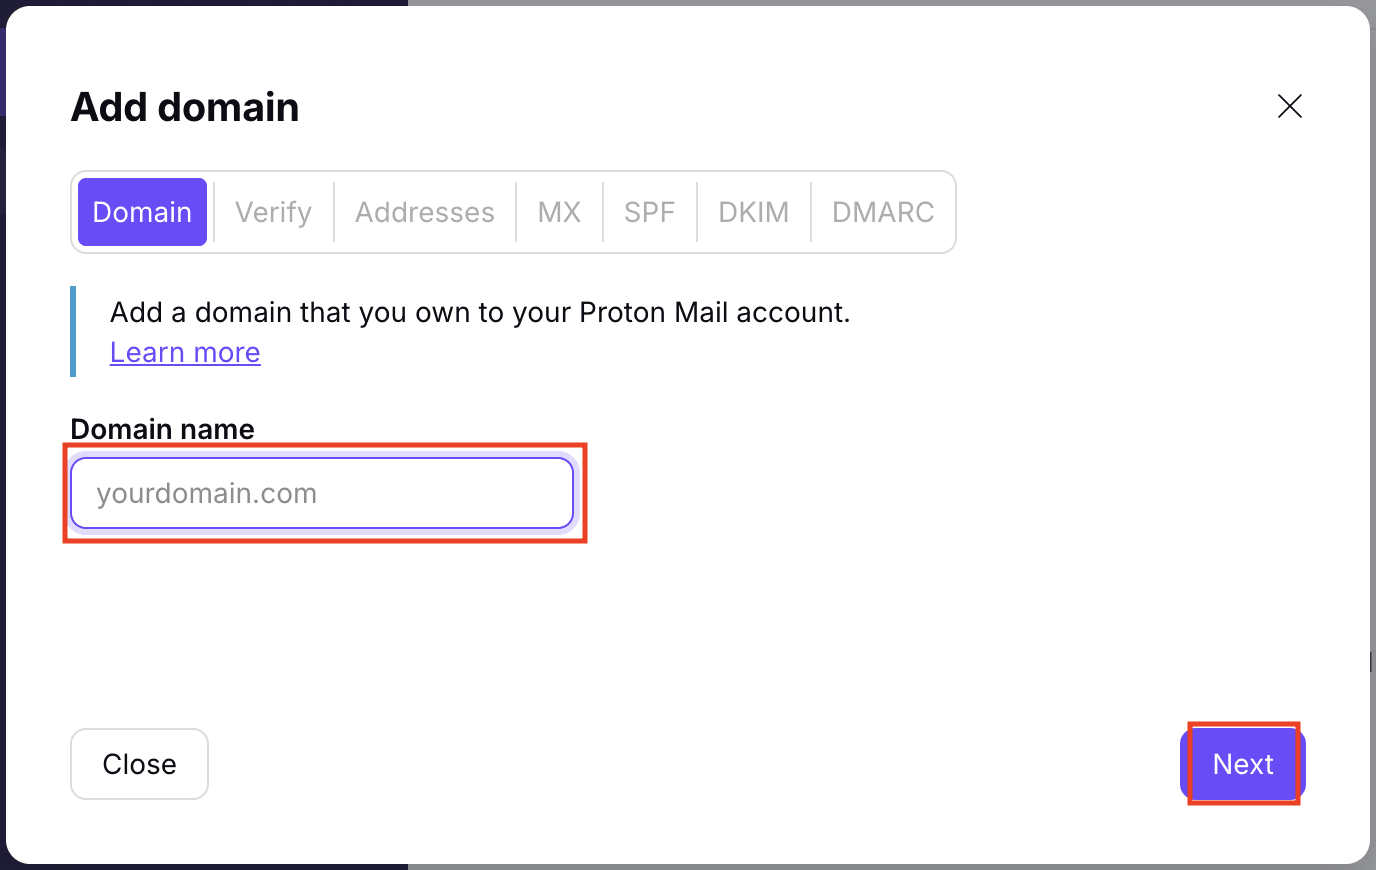
- Enter your Squarespace domain name and click Next.
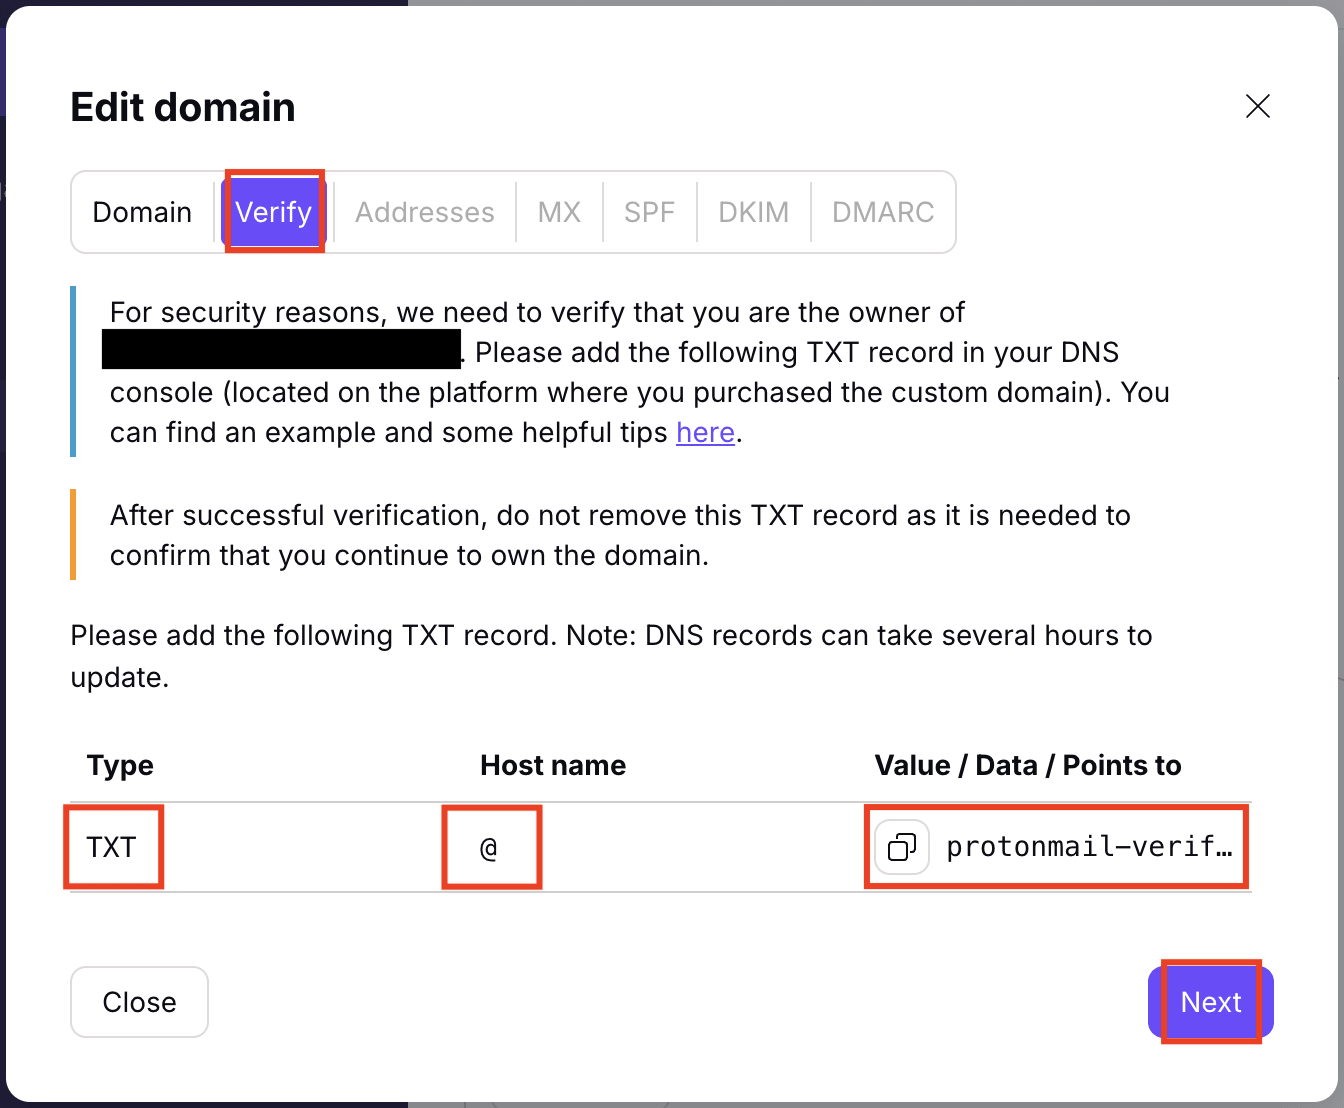
You’ll see a table containing a TXT record. Copy the value from the Value/Data/Points to column.
- Open a new browser tab, sign in to Squarespace(nuova finestra) and open the Domains tab.

- Select the domain you want to configure for Proton Mail, then select DNS Settings in the side panel.
- Scroll to Custom records and click Add record.

- Add the following record:
- Type: TXT
- Name: @
- Text: Paste the Value you copied from Proton Mail.

Click Save.
- Go back to the Proton Mail domain setup wizard and click Next.
We’ll check the TXT records for your domain. Once verified, you can move on to the next step.
Step 2: Set up custom domain addresses
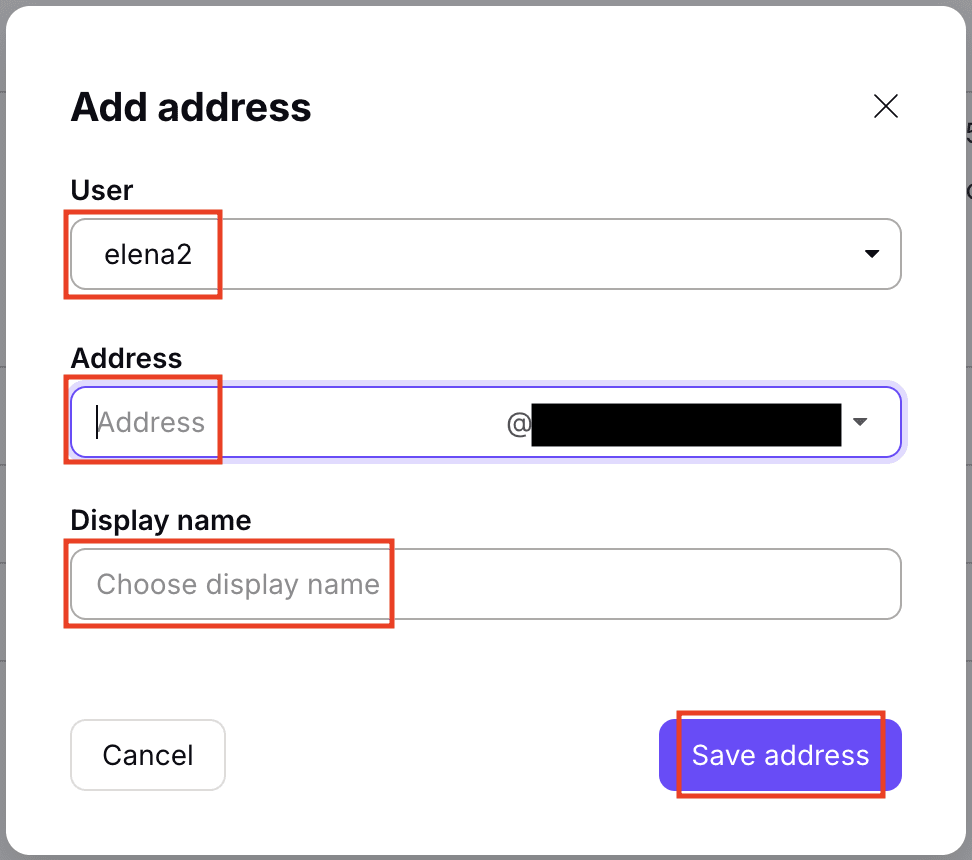
- In the Addresses tab of the Proton Mail domain setup wizard, click Add address.
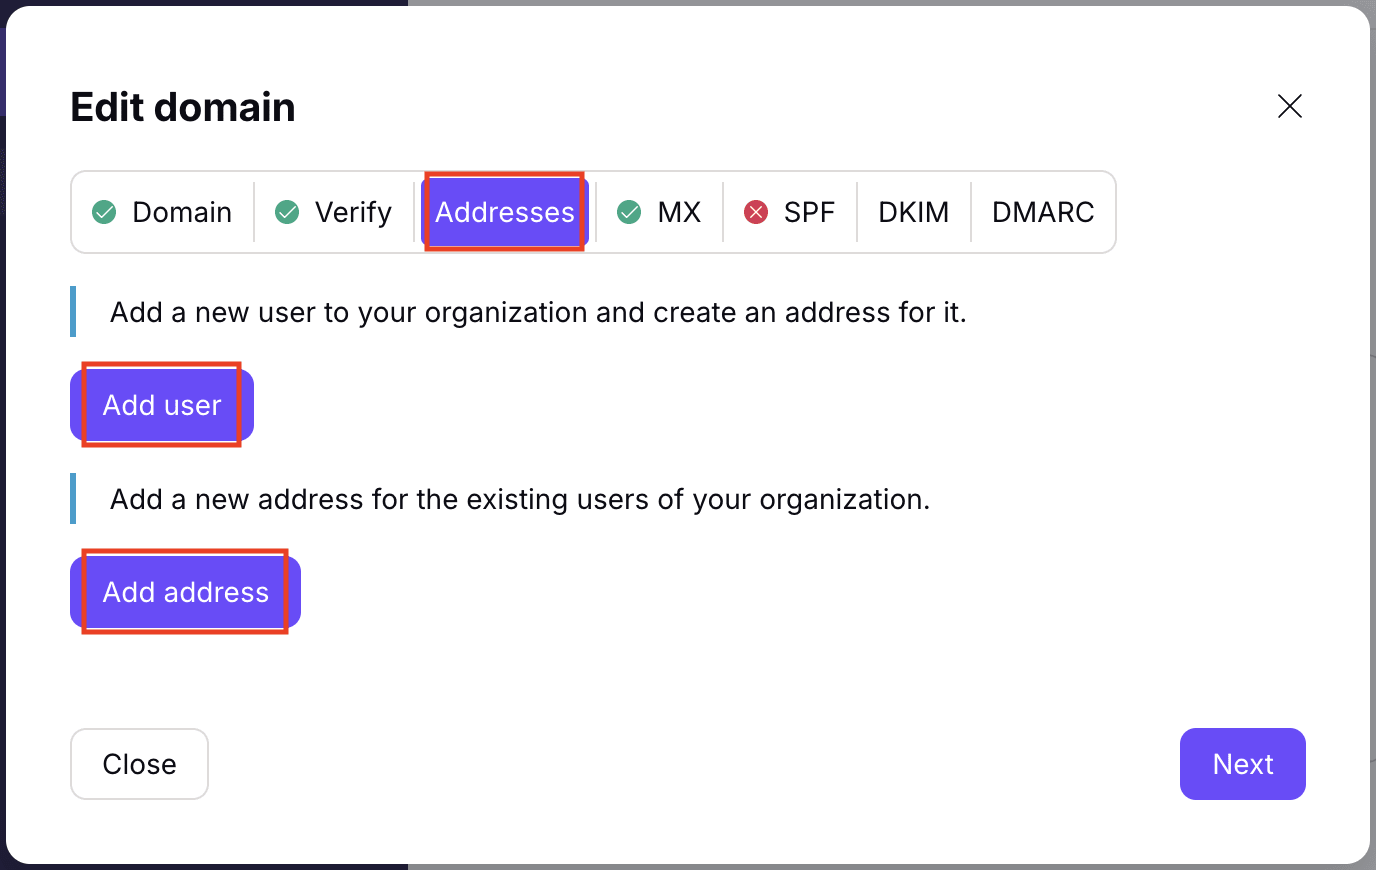
If you haven’t created your user accounts yet, click Add users. Learn how to add users to your Proton organization
- Select the User this address is for, then enter their new Email address and Display name.
- Click Save address to confirm.
- Once you have created addresses for all of your users, inform them of the change and share their new sign-in details with them.
It’s important to do this before you configure DNS records in Squarespace. Once you change the MX records, their emails will be delivered to their new email addresses.
Step 3: Configure DNS records in Squarespace
Now your domain is verified and you’ve added all users and email addresses, it’s time to add more DNS records to Squarespace.
You’ll find the records you need to add in the MX, SPF, DKIM, and DMARC tabs of the Proton Mail domain setup wizard.

If you left setup, you can get back to this screen from your Proton Mail account settings. Select Domain names from the sidebar and click Review next to your domain.
- MX records tell the internet to direct your emails to Proton Mail. Once added, emails sent to addresses that don’t exist in Proton Mail won’t be delivered, because your domain will no longer route mail to your old server.
- SPF, DKIM, and DMARC records help protect your domain from spoofing and improve email deliverability. Without them, your messages may be rejected or sent to spam by major email providers like Gmail.
How to add your DNS records in Squarespace
- Open a new browser tab, sign in to Squarespace(nuova finestra) and open the Domains tab.
- Select the domain you want to configure for Proton Mail, then select DNS Settings in the side panel.
- Scroll to Custom records and click Add record.
- Add the following records:
MX records (essential)
First MX record
- Type: MX
- Name: @
- Priority: 10
- Mail server: mail.protonmail.ch

Second MX record
- Type: MX
- Name: @
- Priority: 20
- Mail server: mailsec.protonmail.ch

If everything is set up correctly, you’ll see a green checkmark in the MX tab of Proton Mail’s domain setup wizard.
If it turns red, go back to your Squarespace DNS settings and delete any other MX records, or make sure the Proton Mail MX records have the lowest Priority value (yes, the lowest — here, a lower number actually indicates a higher priority).
SPF record (highly recommended for security reasons)
- Type: TXT
- Name: @
- Text: v=spf1 include:_spf.protonmail.ch ~all

If you find an existing SPF record, either delete it or change the Text to: include:_spf.protonmail.ch ~all
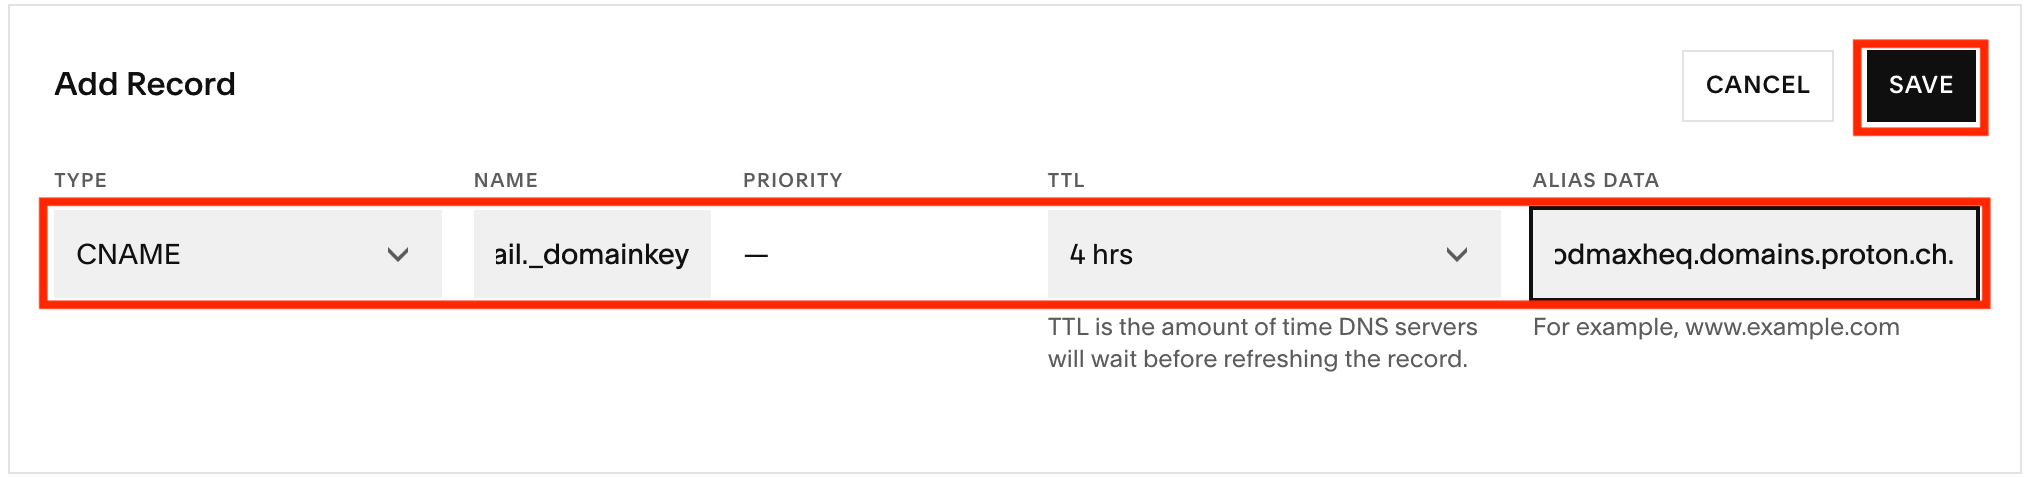
DKIM records (highly recommended for security reasons)
First DKIM record
- Type: CNAME
- Name: protonmail._domainkey
- Alias data: Paste the Value/Data you copied from Proton Mail.
Second DKIM record
- Type: CNAME
- Name: protonmail2._domainkey
- Alias data: Paste the Value/Data you copied from Proton Mail.
Third DKIM record
- Type: CNAME
- Name: protonmail3._domainkey
- Alias data: Paste the Value/Data you copied from Proton Mail.
DMARC record (optional but recommended)
- Type: TXT
- Name: _dmarc
- Text: Copy and paste the value from the Value / Data / Points to entry in the DMARC tab.

The MX, SPF, DKIM, and DMARC tabs in the domain setup wizard should all have green checkmark icons next to them.

This means you can now send and receive emails using your custom domain addresses.